Can I Replace My Cabin Air Filter Myself?
The cabin air filter plays an essential role in maintaining the air quality inside your car. It helps to filter out dust, dirt, pollen, and other pollutants, ensuring you breathe clean air while driving. Over time, your cabin air filter can get clogged and need replacing. But the question is, Can I replace my cabin air filter myself? The short answer is yes, you can replace your cabin air filter yourself, and it’s often a simple and cost-effective DIY task.
In this article, we’ll guide you through the process of replacing your cabin air filter, the benefits of doing it yourself, and what you need to know before getting started.
Why Replace Your Cabin Air Filter?
Before we dive into the “how,” let’s first explore why it’s important to replace your cabin air filter regularly:
- Improved Air Quality: A clean cabin air filter helps maintain a fresh and clean environment inside the car by filtering out contaminants like dust, mold, pollen, and other allergens.
- Better HVAC Efficiency: A clogged cabin air filter can restrict airflow in your vehicle’s heating, ventilation, and air conditioning (HVAC) system, leading to reduced performance and less efficient heating and cooling.
- Smell Control: A dirty filter can contribute to unpleasant odors inside your car, so replacing it can help eliminate musty smells.
How Often Should You Replace the Cabin Air Filter?
It’s generally recommended to replace your cabin air filter every 12,000 to 15,000 miles or once a year, depending on your vehicle’s make and model, as well as the driving conditions. However, if you drive in areas with high pollution, heavy traffic, or a lot of dust, you may need to replace the filter more frequently. Always consult your car’s owner manual for specific recommendations.
Can I Replace My Cabin Air Filter Myself?
Yes, replacing your cabin air filter is typically an easy DIY task that requires only basic tools and a little bit of time. In many vehicles, the cabin air filter is located behind the glove box or under the dashboard, making it accessible to most car owners. Here’s how you can replace it:
Step-by-Step Guide to Replacing Your Cabin Air Filter
1. Locate the Cabin Air Filter
The first step is finding where your cabin air filter is located. The location varies by vehicle, but the most common places are:
- Behind the glove box: Many cars have the filter located behind or beneath the glove compartment.
- Under the dashboard: In some vehicles, the filter can be accessed from beneath the dashboard or from the side of the cabin.
- Under the hood: Some vehicles have the cabin air filter in the engine bay, near the windshield.
Check your owner’s manual for the specific location of your cabin air filter.
2. Gather the Necessary Tools
Replacing the cabin air filter usually doesn’t require much, but here are some tools you might need:
- Screwdriver (flathead or Phillips, depending on your vehicle)
- Pliers (for releasing clips, if needed)
- New cabin air filter: Make sure to purchase the right filter for your vehicle. You can find this in the owner’s manual or consult with an auto parts store.
3. Remove the Glove Box or Panels
If the cabin air filter is behind the glove box:
- Open the glove box and remove any items inside.
- Depending on your vehicle, you may need to detach the glove box or remove a panel to gain access to the filter. In some cases, you might need to unscrew a few screws or release a few clips to take off the glove box or panel.
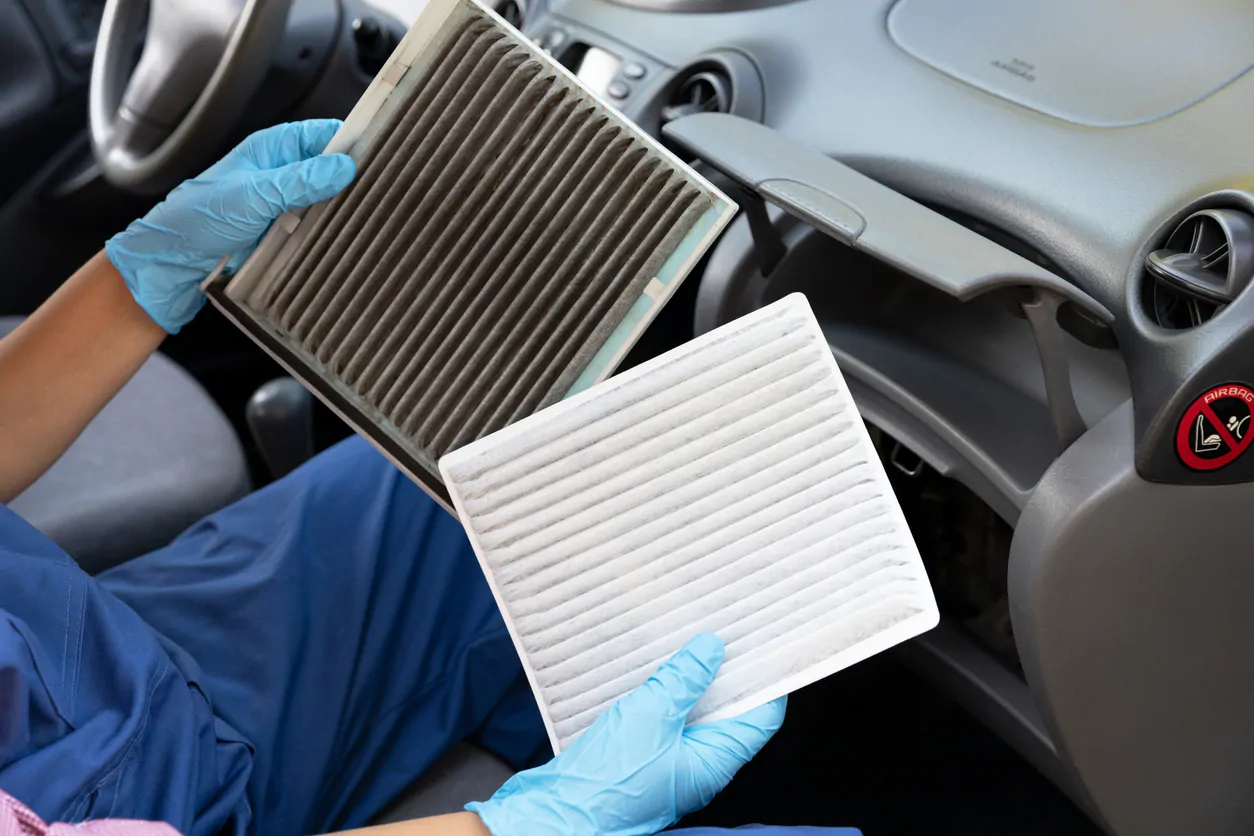
4. Remove the Old Cabin Air Filter
Once you’ve accessed the filter compartment, take out the old cabin air filter. It may slide out easily, or you might need to unclip or unhook it.
- Be mindful of any dust or debris that may fall from the filter during removal.
- Pay attention to the orientation of the filter when removing it, as the new one will need to be installed in the same direction.
5. Clean the Filter Area
Before installing the new filter, use a vacuum or a damp cloth to clean out any dirt, leaves, or debris that might have accumulated in the filter compartment. This will ensure that the new filter stays clean for as long as possible.
6. Install the New Cabin Air Filter
Place the new cabin air filter in the same orientation as the old one. Most filters have an airflow direction marked on the side, so make sure it matches the direction of airflow in your car’s HVAC system.
- Slide the new filter into the compartment, ensuring that it fits snugly and securely.
7. Reassemble and Test
Once the new filter is in place, reassemble any panels or the glove box that you removed. Be sure everything is securely fastened, and then close the glove box.
- Start your car and turn on the HVAC system to test the airflow. If everything seems to be working well, you’ve successfully replaced the cabin air filter!
Benefits of Replacing Your Cabin Air Filter Yourself
Replacing your cabin air filter on your own comes with several advantages:
1. Cost-Effective
A new cabin air filter is relatively inexpensive, and replacing it yourself can save you the labor costs that would be charged by a mechanic or dealership.
2. Quick and Easy
The process typically takes about 15-30 minutes, making it a quick and easy job that you can do at home.
3. Improved Air Quality
A clean filter helps ensure that you and your passengers breathe clean air, especially if you suffer from allergies or respiratory issues. Regular replacement can also help maintain the overall comfort inside your car.
4. Enhanced HVAC System Efficiency
A clean cabin air filter helps your vehicle’s HVAC system function more efficiently, ensuring better heating and cooling performance.
When Should You Seek Professional Help?
While replacing a cabin air filter is generally straightforward, there are a few situations where you may want to consider seeking professional help:
- Difficult Access: In some cars, the cabin air filter may be challenging to access, requiring removal of complicated parts or components. If you’re not comfortable with this level of disassembly, a mechanic may be a better option.
- Other HVAC Issues: If replacing the filter doesn’t resolve poor airflow, strange odors, or HVAC system issues, it might indicate a bigger problem. In such cases, a professional can diagnose and fix the issue.
Conclusion
In most cases, you can replace your cabin air filter yourself. It’s a simple, inexpensive, and effective maintenance task that helps improve the air quality inside your car and ensures the efficient operation of your vehicle’s HVAC system. By following the steps outlined in this guide, you can easily perform this task on your own and enjoy the benefits of a clean cabin air filter.
Remember to replace the cabin air filter regularly as part of your vehicle’s routine maintenance, and if you’re unsure about any step, don’t hesitate to consult a mechanic for assistance.
Also Check:
• Does a 2004 Chevy Silverado Have a Cabin Air Filter?